Showing posts with label Kid's Activities. Show all posts

12/11/2014

Felt Monogram Ornaments

I love felt for so many reasons. The colors are endless, the textures are finger-friendly, the edges never need finishing, and the cost is unbeatable at 25 cents a sheet. I started making many of our crafts out of felt years ago and still haven’t gotten over it (in fact, even starting to sell some online now). So this post will show you a simple ornament tutorial made from felt that can be completely made by hand…no sewing machine required (inspired by this post here).

SARAH'S FELT MONOGRAM ORNAMENTS


You’ll need to cut 2 circles of desired color and a white monogram letter. You can either eyeball the letter and cut it out or print out an enlarged letter from your printer, trace it onto the white felt, then cut.

Blanket stitch your white monogram letter to one of your circles. This is done by inserting your threaded needle down through the monogram and up through the edge of the monogram, wrapping your thread tail around the needle and pulling the needle through. Repeat all the way around your letter and inside any letter holes if you wish. 


On the second colored circle, hot glue a tab of ribbon or twine to the top center.

“Sandwich” the two circles together, making sure the side with the hot-glued tab is facing the inside. Begin a running stitch through the circle “sandwich” edge and at the halfway mark stop to add some polyfill to the inside. Finish the running stitch making sure to tuck the finishing knot on the back or the inside edge.


Hang or wrap your ornament - and enjoy gifting these to your friends and family! 


Sarah for the Sisterhood


**Check out Sarah's felt etsy shop here**


10/21/2014

I Spy Quilt Tutorial


Pinterest provides so many wonderful ideas for quilt designs. I came across this idea a while ago, a quilt that has hidden items for little ones to discover. I decided to create this educational quilt for each family, for the nieces and nephews for their birthday this year (shhhh....don't tell them). The finished quilt size is a lap quilt (36"x42").

UPDATE: After popular demand, Jill has decided to offer completed versions of this quilt on her etsy shop, for those of you who aren't as crafty (or have just run out of time). These quilts are available on her shop for $30. 


                                SUPPLIES NEEDED


            • 42 - 6.5"x6.5" squares (as many fun and random fabrics you want - there are 17 different ones in the quilt pictured)
            • 1 - 40"x48" fleece (backing)
            • 4 - 4"x44" cotton (binding)


QUILT TOP


  1. Sew 6 different squares together to create a row using a 1/4" seam allowance
  2. Do step #1 seven times
  3. Sew each row together creating a quilt top (1/4" seam allowance)


QUILTING


1. Using 40"x48" fleece
2. Place the quilt top in the middle of the backing
3. Pin in place
4. Start in one corner and sew diagonally through the squares, sewing both layers together
5. Repeat in one direction through all of the rows and columns
6. Switch and do the same thing in the other direction, creating an x in each square


BINDING

  1. Create your binding tape
  2. Sew binding tape along the edge (1/2" seam allowance), mitering the corners as you go
  3. Trim the excess backing material
  4. Turn binding tape to back
  5. Pin in place
  6. Sew 1/4" in to the quilt from the ditch of the binding


Create fun I Spy clues for the different things within the quilt squares!

7/22/2014

Super-Easy Freezie Pops

Yesterday here in Minnesota, we were under an "Excessive Heat" Warning (which, being interpreted, means that our temps exceeded 90 degrees). So in order to help my kids cope with temperatures they're not quite used to (and bribe my 4-year-old to take a nice, long nap), I made them these Fruit & Yogurt Smoothie Pops. Easiest thing I've ever made for them. The whole process took me less than 5 minutes, and they completely froze and were ready to eat by the end of nap time. If you're into "real foods," these are for you. If you just want something simple and tasty, these are for you too. 


My ingredients (as called for) - I didn't use quite
as much spinach - maybe 5 or 6 leaves?
But he didn't notice. :-) 
Ingredients in the blender (can anyone tell what
I forgot to add?)

After blending everything
For my "pops" I just used dixie cups and
craft sticks from the Dollar Tree

This is just to help you know that, while we try to be healthy, we are also still normal people who need the occasional ice cream Snickers bar too.

The End Results?
Checking it out
Happiness


Note: This smoothie pop was apparently so good and filled my son up so much that he told his VBS teacher last night that he "didn't need" the popsicle she offered him during snack time. No I didn't tell him he couldn't have treats - usually this child is so treat-deprived that he'll eat as much sugar as he can get outside of the home. :-) I guess these were just that good. Hope you can all enjoy them too! Let us know what your kids think. 

Megan
for the Sisterhood

2/06/2014

The Value of Play Dough (and how to make your own)

As the mother of preschoolers, I often feel like my full time job is cleaning up messes.  Therefore, it is in my nature to put an end to any play that is going to result in more messes.  However, when it comes to play dough, I feel that the mess is worth the benefits.


First of all, I am not a huge fan of store bought Play-Doh.  It smells funny and leaves a mess all over the table, chairs, floor, and children.  It's also sticky, costly (if you’re going to have a good quantity and variety of colors) and comes in rather small quantities.  On the contrary, I am a huge fan of homemade play dough, which doesn’t smell (well, not like the store bought kind) and is easier to deal with mess-wise than the store bought kind.  It also lasts for a long time in a sealed container and can be made in larger quantities in whatever color desired.  For the most part, homemade play dough is fairly inexpensive (well, except for the cream of tartar, which I have recently found very affordable at our local Aldi). So for these reasons, and for the benefit of mothers like me who like learning activities - and less mess - I'm sharing my Top 10 reasons for encouraging play dough play time with your kids, along with my favorite play dough recipe below:


1.  FINE MOTOR SKILLS - Before a child can maneuver a pencil to make letters and numbers, he must get lots of practice using his fingers.  Play dough helps fine tune those finger muscles in an enjoyable way.


2.  IMAGINATION & CREATIVITY - Creating a zoo, an elaborate meal, a train, a baseball game, etc... can all be accomplished through the use of play dough. You'll also enjoy seeing what kinds of things each of your kids likes to create over and over.


3.  SHARING - Ah, every mom's favorite word. Multiple children + multiple colors + plus multiple tools = great opportunities for sharing, taking turns, and working through getting along.


4.  EARLY SCISSOR SKILLS - Cutting play dough is much easier than cutting paper.  We like to roll the play dough into a long thin snake, and then use scissors to chop it up into small pieces. Hopefully too, your child won't initially associate scissors with cutting all things paper.


5.  GREAT TALK TIME - I love to talk with my kids while we play with play dough. And I love to listen to them talk to each other if I’m occupied with another kitchen task while my kids play with play dough together.


6.  FOCUSED ATTENTION TIME - The ability to sit still and concentrate on one activity for an extended time period is lost on many preschoolers.  A play dough playing session can help train children to focus while still enjoying themselves.


7.  NUMBERS & LETTERS - Play dough can aid in the teaching of numbers and letters (either by shaping the characters with the play dough or through the use of cookie cutters similar to these).


8.  SHAPES - Play dough is a great manipulative for learning shapes - both 2 and 3 dimensional.  It’s pretty hard to draw a sphere or a cone, but play dough makes visualizing in 3 dimensions easy.


9.  GREAT FOR TACTILE LEARNERS - Play dough is a fabulous tool in the hands of a tactile learner!  If you have a child that learns best through the form of touch, please don’t rob them of the opportunity to learn via play dough.


10. SCHOOL PROJECTS - We have used play dough to make a volcano for a science project and a 3D map for a geography project.  How about those 3rd grade solar system projects, or the 6th grade model of a cell project?  The play dough possibilities are endless, and a real staple around here.


BONUS: A final benefit of play dough … stepping on play dough doesn’t hurt nearly as much as stepping on a Lego. :)


RECIPE FOR HOMEMADE PLAY DOUGH

Ingredients:
  • 1 c. flour
  • ½ c. salt
  • 2 tsp. cream of tartar
  • 1 c. water
  • 2 Tbsp oil
  • 1 tsp. food coloring


Directions: 
Combine flour, salt, and cream of tartar in medium sized sauce pan. Gradually stir in water, and oil. Cook over medium heat, stirring constantly until a ball forms. Remove from heat and knead food coloring into dough on a protected surface as color may bleed out while dough is warm.

Store play dough in either a sealed plastic container (similar to Gladware) or a Ziploc style bag at room temperature.


10/28/2013

ABC Verse Cards


Oscar's Alphabet Book
Our "Oscar" recently turned one, and is becoming quite the book-a-holic. I wanted to create something special for him that was full of memories and educational. I came across an idea on Pinterest to create an alphabet book that was specific to the child. Using that idea, I sat down and created a photo alphabet book with all of Oscar's favorite things and people in it.


"G-H" pages of his Alphabet Book
"Q-R" pages of his Alphabet Book
Desiring to pour God's Word into his life, my husband and I found Bible verses for each letter of the alphabet for the book as well. The Sisterhood requested that those verses be turned into flashcards that could be used with their children. God's Word does not return void, and our prayer is that the truths of God's Word will take root in the hearts of our children.


If you wish to receive a PDF file of the verse flashcards as pictured above, please send an email request to albright.sisterhood@gmail.com with the subject line "Verse Cards." Thanks, and we hope these can be a blessing to you and your kids!


5/28/2013

Children's Author Highlight Series

(c) Microsoft
"Children are made readers on the laps of their parents." -- Emily Buchwald

I have seen this quote floating around Pinterest lately, and it has gotten me thinking about how much time we spend reading in our home, and how we could step it up in this area.  I plan to saturate our summer with books - of all sorts!  I have built into our summer schedule time for Bible reading, picture book reading, chapter book reading, fiction reading, non-fiction reading, silent reading, solo reading, group reading ... you get the idea. :)

I plan to highlight one of our favorite children's authors every Monday here at the Sisterhood - and hopefully this might inspire some of you to read more with your children, frequent your local public library this summer, create great memories with your children, and develop great readers in your own home.

Watch Monday for the first Children's Author Highlight - one of our current favorites!


3/20/2013

Kid Activities: Carrots, Candy, & Coloring (pre-school age ideas for learning the letter 'C')


Today, Joanne will share a few ideas for the preschool age that will help make their letter learning more memorable and fun. 


Last year, in preparing my five-year-old daughter for kindergarten, I spent a number of our weekday mornings focusing on some basic activities. The following are some of the fun ways we explored the letter C:


Carrots

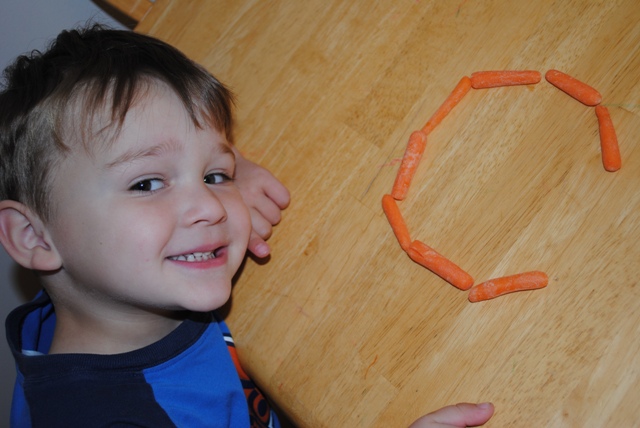
First, I pulled out some baby carrots, and we formed them into the shape of the letter C.


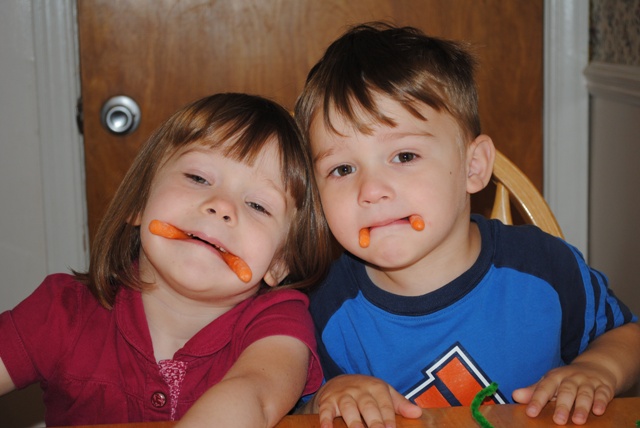
Then we ate the carrots as a mid-morning snack (gotta get those vegetables in there somehow). 

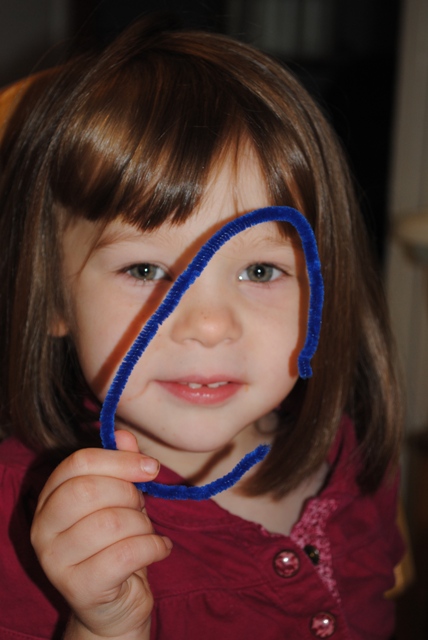
Next, we took some pipe cleaners and shaped them into the letter 'C' as well.

Candy
Next, I gave my kids a coloring page of the letter C (link for that in the next section) and a snack size package of M&Ms.  The kids then lined up their candies along the shape of the letter C on their coloring page.

Coloring
One of my favorite website resources is www.twistynoodle.com.  This website is a free resource of hundreds of coloring pages.  I printed a coloring page with the letter C for our study of the letter C, which I let the kids color to finish our letter 'C' activities.
 

When I print an alphabet coloring page, I punch holes in it for storing in a three-ring binder.  That way, when we are finished working our way through the alphabet, my kids will each have an alphabet book they have colored themselves.


What are some of your ideas for teaching your preschoolers their letters and numbers? Feel free to comment and share. We'd love to hear your own ideas!


*make sure to check out Sarah's idea for teaching your primary aged kids to alphabetize with clothespins

3/18/2013

Kid Activities: Clothespin Practice Game for 1st graders

For the next few posts, we wanted to feature some activity ideas that some of us sisters have found/borrowed/created for our kids. In this post, Sarah shares a great idea for the primary age group (K-2nd) that helps give kids a fun way to learn alphabetizing, math, etc.


My daughter is in the first grade this year and because of our transition to a move out West, we chose to school her at home using an online program from Bob Jones University Press. I love it and recommend it! It has made it so easy for me to be a teacher and a mom all at the same time. I love “going back to school” myself and sometimes think that the handouts, printables, and educational activities are more exciting to me than they are to my daughter. But thankfully she is a crafter at heart as well, and therefore we find ourselves giggling about whether or not there will be a craft to do in Heritage or Phonics & Reading that day.


Which brings me to this blogpost. Recently on Pinterest I saw a teacher who used clothespins to help her children practice alphabetizing. It instantly grabbed my attention with how inexpensive, simple-to-use, and customizable it was. My mind began racing with the other possibilities it held. My daughter has been working on alphabetizing in Phonics & Reading so that was a perfect practice “game.” 

Then she began working on days of the week and months of the year in Math. I decided to use the same clothespin game method for these concepts as well. She loved it, and commented that it was a “fun game but we’re learning something at the same time!” 

Even my little 2 ½ year old has enjoyed clipping and unclipping the clothespins...maybe good for the fine motor skills? So thank you to Mrs. Morrow and Pinterest!

10/16/2012

Fall Pumpkin Craft - Kid Friendly

For this fall season, I’ve been looking for some safe pumpkin decoration options for our family of little people with inquisitive minds but tender fingers. So when I went to a friend’s house this week, I noticed a craft that she had done with her daughter, making small pumpkins out of strips of decorative paper. Her idea involved also making a garland with them. I thanked her for the idea and the next day figured out how to create these with my kids! 

After doing the first few, the kids and I got a system down and made over a dozen - easy and completely harmless! In the end, we made a garland and name cards out of these darling little pumpkins. I'm sure that you can come up with even more ways in which to use these. So if you are interested, here's a quick tutorial for this kid-friendly fall craft:

Fall Pumpkin Craft for Kids
Trim 1” strips of decorative or colored paper. You will need four strips for one pumpkin.
Punch small holes in each end of each strip.
Tear off a small scrap of green paper and pierce with a brad.
Take the end of one strip and place under the green scrap threading it onto the brad.
Wrap the strip around to form a circle and place the other end of the strip onto the brad. Repeat 4 & 5 three more times.
After all four strips (eight ends) are threaded onto the brad, fold the brad’s ends down and apart from each other.
Turn and straighten the strips so they form an even circle.
To make the garland, simply thread twine through the strips of the pumpkin.
For name cards, simply write names and flatten gently so they stay in place.

Happy Kid-Crafting!