11/08/2011

Jewelry Basics for Beginners: Part 1

(c) Microsoft Office
Tis the season to be crafty. And already, I've noticed a lot of people (on Facebook, etc.) getting creative and sharing ideas about their decorating and gift-giving. The Albright Sisterhood is really looking forward to Christmas, since we will all, once again be together. However, every Christmas has added more and more (and more) children/spouses/etc. to the mix, which can make gift-giving a financially daunting thought. So in the spirit of thriftiness, we've all decided to try our hands at something homemade. We may be sharing some other ideas throughout the next couple of months. 

So for starters, I'm going to share the basics of what my homemade gifts will be (NOTE: my sisters might get to see little "sneak peaks" of their gifts) - jewelry! I hope you enjoy these ideas - and if you needed a little homemade inspiration, you could do this! Yes, you! So read on!

Tools of the Trade
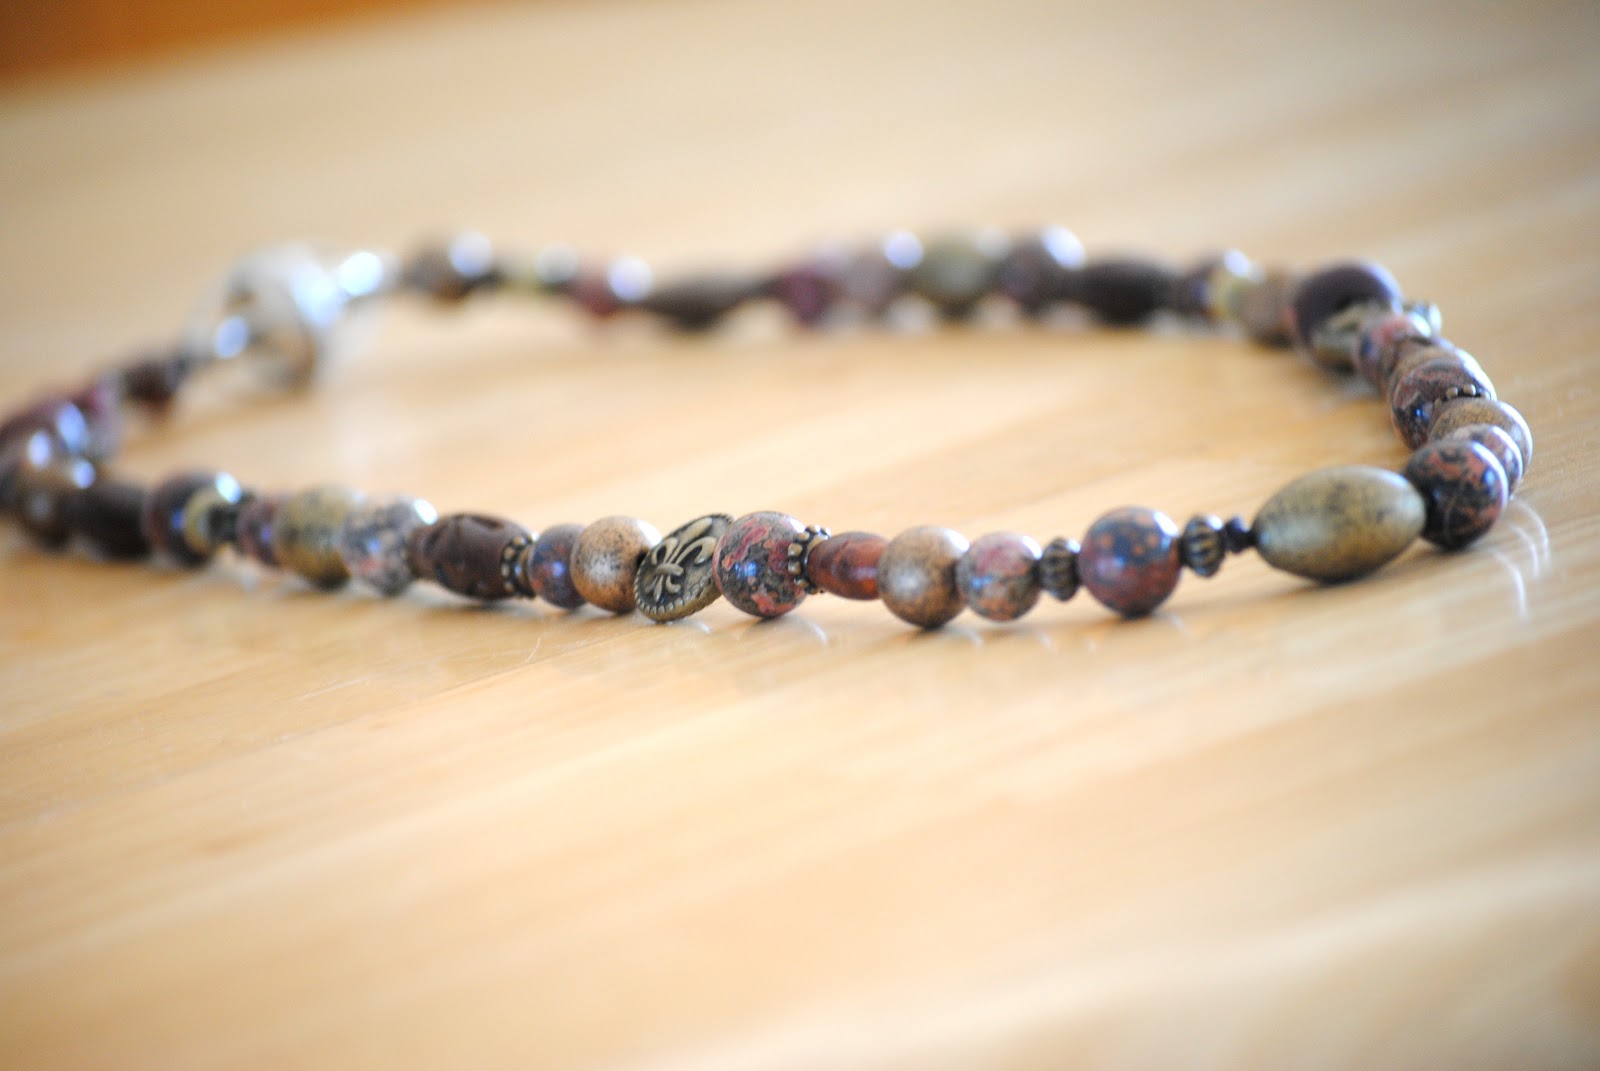
The first "sneak peak"
Let me preface all of this by stating that I am definitely no expert in the realm of jewelry-making. I have learned a few of the basics and experimented with making different types of jewelry; but I'm not ready for Etsy or my own website. If you already have done some jewelry-making of your own, then you might want to skip this post and wait for Part 2 (where I'll share some of my end-products and other ideas). This part is to help those who have never done this sort of thing, but may have (like I did at one point) looked at a rather expensive piece of jewelry and thought "I could do that." It may be easier than you ever imagined.

To begin, here is a photo detailing the main "tools" that I use to do most things in jewelry-making. There are a slew of other tools that you can purchase for specialized processes, but these should help you handle most things. 

~ click to enlarge for better viewing ~

You'll first notice 3 sets of handled tools - and you can buy these 3 things usually in a set at Walmart or your local craft store (usually for around $10). They are the Flush Cutters (or wire cutters), Round Nose Pliers, and Chain Nose Pliers (very similar to needle-nose pliers if you have some). Obviously, you'll also want to start out with some beads for what we're going to do, as well as some jewelry findings (detailed below). And I always keep a bottle of super glue handy to help seal different "joined" spots.

Wiring a Bead
For the most basic task - bead wiring - you'll also want to have these jewelry "findings" on hand.


Both the Eye Pins and the Head Pins can be use to thread through a bead and create a loop on the other end. The following pictures will help walk you through that process.
I first pulled a head pin through this bead. The "head" is what is keeping the wire from just completely pulling through. Then to start my loop, I bent the pin at a right angle where it comes out of the other end.
About 1/2" past that, I grabbed the pin with the Round Nose Pliers and started looping the pin around one of the rounded noses.
Once the pin has been looped around the plier nose (creating an "O"), then I start to twist the rest of the pin around the base of the "O" (or "eye"). 
After twisting it around the base a few times, I usually have about 3/4" of pin left. So, using the Flush Cutters, I'll then trim off the remaining pin. 
Finished Bead with Head Pin
Finished beads like this can be used dangle off of a chain (on a necklace) or off of other linked beads. Some more examples of that will be shown in Part 2. This same process is also what you can use with the Eye Pins, the difference being that you will have "eyes" on both ends (which will give you the option of linking those beads together or to a piece of chain.
Finished Bead with eye pin
With the eye pins, you can link them together either by using a Jump Ring or by opening up one of the eyes and linking it through the other bead's eye.
Linking beads together through their "eyes"
A Jump Ring is just a solitary "loop" or eye that can be opened up to link two beads together. This process basically does the same thing as just linking the two eyes together; but it gives a little extra space in between. You can also use the jump rings to link beads with head pins to chain or other beads.
A jump ring - opened up, linked through a bead's eye, and sealed with super glue.
I usually use my Chain Nose Pliers for this process, since they do the best job of pinching the ring back together. (NOTE: I don't prefer to pinch the ends together by "grabbing" the sides of the ring, since that usually tends to misshape it. Rather, I will try to re-align the ends by pinching them sideways.) I also like to seal these with a dab of super glue, since they can be pulled apart (especially if kids get a hold of the jewelry). 
Two beads linked with a jump ring
I hope that these instructions can help you see how simple some of the basics are. And with these tools and practices in hand, you can start putting together almost anything. Below are just a few beads that I've started wiring in preparation for a special piece of jewelry that we are going to be giving away here on this blog in the next few days. So keep checking in with us, and I hope you're intrigued ...
Want to see what these will be? Check back with us soon ...


3 comments:

  1. I would love to try this, but I think it looks as complicated as when I learned to crochet!!! I would be game to try this....thanks...Dee Dee Payne

    ReplyDelete
  2. you should post a video of wiring the beads. ;o) I'm definitely inspired. Poor mom - all she's getting this year is jewelry! :o)

    ReplyDelete
  3. Good job, Megan! I've been making jewelry for about five years now and I find it addictive! I love experimenting with some of the new looks I see in catalogues! Love your thorough explanations!

    Sue Ann Phillips

    ReplyDelete